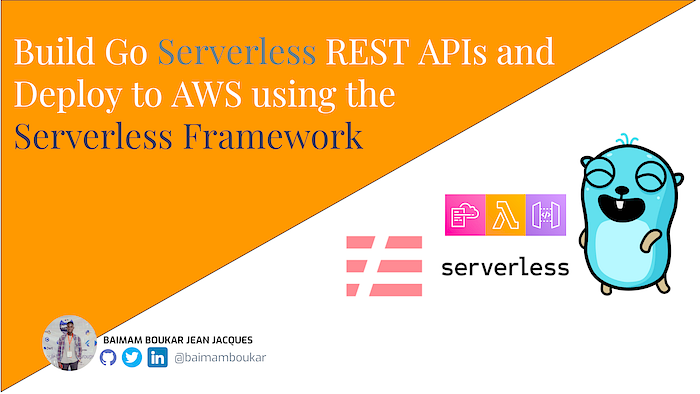
Build Go Serverless REST APIs and Deploy to AWS using the Serverless Framework
Imagine your app scaling effortlessly, and you’re very far from the stress of server management. That’s how serverless `sounds` like, and Go is the perfect language to lead the charge.
This article takes you on a hands-on journey where you’ll leverage Go’s powerful web framework GIN and the AWS Lambda GIN proxy to build efficient serverless APIs and seamlessly deploy them to the AWS Cloud using the magic of the Serverless Framework.
Leeroy Jenkins! Let’s get started 🚀
Let’s setup Gin
To spin up a web server for our REST APIs, we need Gin. Gin is a powerful web framework written in Go. It claims to be 40 times faster than Martini, a technology of the same genre. If you need blasting performance, get yourself some Gin
- To install gin, go ahead and run
go get github.com/gin-gonic/gin- Now you can set up a minimal Gin router. For that, copy the example in the GIN documentation and paste it in the
main.gofile
// main.go
func main(){

r := gin.Default()

r.Get("/ping", (c *gin.Context){
c.JSON(http.StatusOK, gin.H{"message": "Pong!"})
})

r.Run("8000")


}- When you’re all good, you can now run the server
go run main.go- When you visit `localhost:8000/ping`, you should see expected response.
Let’s setup the Serverless framework
First thing first: What is `Serverless Framework` ?
Serverless is a tool that makes it easy to deploy serverless applications to AWS.
Zero-Friction Serverless Apps on AWS Lambda: Deploy APIs, scheduled tasks, workflows and event-driven apps to AWS Lambda easily with the Serverless Framework.
It removes the hell related to deployment in so many ways. Yeah! `Zero-friction serverless development`, Indeed.
Why? Because:
- You define your applications as functions and events by declaring AWS Lambda functions and their triggers through simple abstract syntax in YAML.
- After deploying your serverless app in a single command, Lambda functions, triggers & code will be deployed and wired together in the cloud, automatically.
- You can also extend your use cases by installing thousands of Serverless Framework Plugins.
Installation of the Serverless Framework
- To install the serverless framework, we need `nodejs`. If you don’t have Node.js installed, you can go ahead and install it from there:
Download | Node.js
Node.js® is a JavaScript runtime built on Chrome's V8 JavaScript engine.
nodejs.org
- Simply run the command `npm install -g serverless` to get the serverless framework.
- To make sure it has been installed, you can run serverles -v`. You should have a similar output.
Framework Core: 3.38.0
Plugin: 7.2.0
SDK: 4.5.1s
Let’s Express our serverless application
Now that we have serverless installed, we can go ahead and define our serverless app.
As mentioned above, we define our application events and their triggers in a simple `YAML` file.
Let’s do it 🎉
In the root of the project, create a file named serverless.yaml
service: serverless-go
frameworkVersion: '>= 3.38.0'
useDotenv: true
provider:
  name: aws
  runtime: go1.x
  region: us-east-1
  stage: ${opt:stage}

functions:
  api:
    memorySize: 3008
    timeout: 10
    handler: bin/main
    events:
      - http:
          path: /greetings
          method: GET

package:
  patterns:
    - bin/*
Let’s break this `YAML` configuration down.
Let me break this configuration down. Think of it as a blueprint for our serverless app on AWS. Each configuration option in this file is like a piece of the puzzle that will make our serverless application work in the cloud.
- service: It’s like naming your project; here it’s called "serverless-go.”.
- frameworkVersion: It specifies the serverless framework version you’re using, ensuring compatibility.
- dotenv: This tells Serverless to load environment variables from a file called ".env," keeping secrets safe.
Provider:
- name: “aws” means you’re deploying to Amazon Web Services.
- runtime: “go1.x” means your code is written in Go.
- region: “us-east-1” is where your app will live on AWS.
- stage: This allows different deployment environments (like "dev," "staging," and “prod”). Not that the use of ${opt:xxx} specifies we will be passing the stage as an argument from the terminal, when we call the deployment command.
Functions
- api: This defines a single function called "api”.
- memorySize: 3008 MB of memory is allocated for this function.
- timeout: 10 seconds is the maximum time it can run for each request.
- handler: “bin/main” tells Serverless where to find your Go code’s entry point.
- events: These define the triggers that will make your function execute:
- http: These events tie your function to API endpoints (like “/greetings”).
Package
- patterns: This tells Serverless which files to include when packaging your app for deployment.
Now we’re ready to deploy 🚀
Before that, let’s setup a `Makefile` to avoid typing the same commands repeatedly.
Create a `Makefile` in the root of your project and paste this content.
build:
env GOOS=linux go build -ldflags="-s -w" -o bin/main main.go
deploy: build
serverless deploy - stage prod
clean:
rm -rf ./bin ./vendor Gopkg.lock ./serverless
🚨 You’ll need to setup your `AWS` profile before deploying, if it’s not yet done. This can be helpful in setting up your account on the local machine.
After setting up your AWS account, you can go ahead and deploy the serverless app by running this command
make deployIt will take a few minutes for `Serverless` to compile, package, and deploy the application. While waiting, stay calm, `fingers crossed`. (If you want, you can pray for it to work on your first try 😂😂😂). Anyways….
When the deployment is complete, a link will be generated for each API endpoint defined in the serverless.yaml file for you to test your APIs. You can click on that link and test the `/greetings` GET route. Normally, you should see a JSON response like this:
{
  "message": "Hello friend 👋"
}
But guess what? It will not work. Instead, you will receive a timeout , resulting in a server error.
If this happens, there is a reason. Let me explain why.
Why does the handler function time out?
Well! The reason is that we’re not properly handling our requests. What happened is that the server has started and has emitted the request. But the request is not sent in a way that AWS requires it to be formatted.
The AWS documentation for the Lambda function handler in Go says:
The lambda function handler is the method in your function code that processes events. When your function is invoked, Lambda runs the handler method. Your function runs until the handler returns a response, exits, or times out.
A Lambda function written in Go is authored as a Go executable. In your Lambda function code, you need to include the `github.com/aws/aws-lambda-go/lambda` package, which implements the Lambda programming model for Go. In addition, you need to implement handler function code and a main() function.
Indeed, we missed a lot of what the documentation says! Let’s fix this.
Refactoring in AWS style
- First, we need to add the package mentioned in the documentation.
go get github.com/aws/aws-lambda-go/lambda- Including Gin proxy handler in main
We now need to refactor our `main.go` file to:
1. Add the handler function code lamda function
2. Start the lambda server to listen to incoming requests
3. Wires the lambda function responses to our GIN server: This proxy will act like a bridge between our AWS Lambda functions and our GIN server
package main

import (
 "context"
 "log"

 "github.com/aws/aws-lambda-go/events"
 "github.com/aws/aws-lambda-go/lambda"
 ginadapter "github.com/awslabs/aws-lambda-go-api-proxy/gin"
 "github.com/gin-gonic/gin"
)


// AWS gin lambda adapter
var ginLambda *ginadapter.GinLambda

func init() {

 //Set the router as the default one provided by Gin
 router := gin.Default()

router.Get("/greetings", (c *gin.Context){
  c.JSON(http.StatusOK, gin.H{"message": "Hello friend 👋"})
})


 // Start and run the server
 ginLambda = ginadapter.New(router)
 //router.Run(":8000")


// AWS Lambda Proxy Handler
// This handler acts like a bridge between AWS Lambda and our Local GIn server
// It maps each GIN route to a Lambda function as handler
//
// This is useful to make our function execution possible.
func GinRequestHandler(ctx context.Context, request events.APIGatewayProxyRequest) (events.APIGatewayProxyResponse, error) {
 return ginLambda.ProxyWithContext(ctx, request)
}

func main() {
 // Starts Lambda server
 lambda.Start(GinRequestHandler)

}
After updating our `main.go` file, we can save the file and redeploy again.
When the deployment is successful, you should see a list of the endpoints with their URLs.
Go ahead and test the `/greetings` GET route. This time you should receive a success response.
{
  "message": "Hello firned 👋"

}
That’s it! It worked 🎉
Wait! What happened under the hood?
To say it all in one, `Serverless` took care of everything for us.
In fact, serverless uses our expressions and configurations in the `serverless.yaml` file to create an `AWS Cloud Formation Stack`.
- After your application is compiled
- Serverless takes the compilation binary and packages it up
- The binary is then uploaded to an `AWS S3 Bucket`
- Then this binary code will be attached to a Lambda function as handler
- The lambda function is triggered `on` an `AWS API Gateway` event
All this has been handled by `Serverless`, based on our configuration file.
Bonus: What’s next?
This is a minimal example of creating serverless RESTful APIs using Go and AWS. You can do a few things to enhance the application. For example, connecting it to a database like Amazon DynamoDB and refactoring the project to add more API endpoints.
You can find the complete source code for this tutorial here:
Thanks for reading ❤️🔥✨
My name is Baimam Boukar. I’m a software engineer, and I enjoy sharing my knowledge through blog posts. I write about Serverless and Go Cloud native applications in AWS, Flutter mobile app development, and Bitcoin development. Let’s stay connected